

To make butter in a fun and educational activity for kids, shake heavy cream in a jar until it solidifies. This simple process transforms cream into butter and buttermilk.
Embark on a delightful kitchen adventure with your little ones as we explore ‘How to Make Butter in a Jar with Kids.’
Let’s have some kitchen fun with the kids! We’re going to learn ‘How to Make Butter in a Jar with Kids.’ It’s super easy and exciting. We’ll shake a jar filled with heavy cream, and guess what? It turns into yummy butter!
This cool activity not only teaches kids about science but also helps them build strong hand muscles as they shake the jar. It’s perfect for school or home, and by the end, we’ll have our very own homemade butter to enjoy on bread or crackers.
The Magic Of Making Butter
Imagine turning liquid cream into solid butter with just a few shakes! That’s right, making butter is like a magic trick that you can eat. It’s a fun and easy way to learn a bit of science and enjoy a tasty treat at the end. Let’s discover the magical journey from cream to butter together!
From Cream To Butter: A Mysterious Transformation
Have you ever wondered how cream changes into butter? It’s a fascinating process that involves a few simple steps:
- Start with heavy cream – the kind you find in the fridge at the store.
- Shake, shake, shake – the more you shake, the thicker it gets.
- Watch as the cream thickens and suddenly turns into butter.
During this mysterious transformation, the fat molecules in the cream get shaken up. They start to stick together, making tiny butter grains. Keep shaking, and soon you’ll have a clump of butter!
Why Butter Making Is A Great Preschool Activity
Making butter is not just about the yummy result. It’s a wonderful learning experience for little ones:
- It teaches patience – shaking the jar takes time.
- It’s hands-on science – children see and feel the change.
- It encourages healthy eating – knowing where food comes from is important
This activity also enhances motor skills and provides a sense of accomplishment. Kids love watching the cream turn into butter right before their eyes. Celebrate with some fresh bread and enjoy the butter you made together!

Credit: primaryplayground.net
Before You Churn: Ingredients & Tools Needed
Welcome to a buttery adventure perfect for little hands and big imaginations! Before the churn begins, it’s important to prepare. Let’s explore the ingredients and tools needed for this fun, educational activity.
GATHERING THE ESSENTIALS
First things first, let’s list what we need. With just a simple set of tools and ingredients, your preschooler can witness a creamy transformation.
- Heavy cream: 1 pint, straight from the fridge
- A jar with a tight-fitting lid: A mason jar works well
- Measuring cups (optional, for the cream)
- A bowl: To catch the buttermilk
- A wooden spoon: To press out excess liquid
- Cheesecloth: To strain the butter (optional)
SAFETY TIPS FOR PRESCHOOLERS
Safety is key! Here are tips to ensure a safe and enjoyable experience.
| Tip | Explanation |
|---|---|
| Supervise Always | Stay with your child throughout the activity. |
| Tight Lid | Make sure the jar is securely closed to avoid spills. |
| No Glass | Use plastic jars to prevent breakage. |
| Handle With Care | Help your preschooler hold the jar if it’s too heavy. |
Step By Step: How to Make Butter in a Jar with Kids
Let’s dive into the magical transformation of cream into butter! Making butter with your preschoolers is not only fun but also an excellent way to teach them about science, patience, and hard work. All you need to get started is some heavy cream and a jar. Follow the simple steps below, and soon, you’ll have your very own homemade butter!
Shaking Up The Cream
First, gather the kids and a jar of heavy cream. Make sure the cream is cold; it turns into butter faster this way. Fill the jar halfway with cream so there is room for the shaking magic to happen. Close the lid tightly.
- Pass the jar to each child and let them shake it vigorously.
- The cream will go through stages. It will become thick whipped cream first.
- Keep shaking! It is part of the fun.
- After about 10 to 15 minutes, you will notice a change in sound. This is a clue that butter is forming.
Identifying When Butter Forms
As the shaking continues, teach the kids to listen and watch for signs of butter. The sound of the liquid will lessen. This tells you that the butter is separating from the buttermilk. Soon, you will see solid yellow bits of butter clumping together.
| Time | Observation |
|---|---|
| 0-5 minutes | Cream becomes thicker |
| 5-10 minutes | Whipped cream forms |
| 10-15 minutes | Change in sound, butter begins to form |
When the solids gather into a lump and the liquid becomes clear, you’ve made butter! Strain off the liquid, which is now buttermilk, and you can use it in your recipes. Rinse the butter lump under cold water to remove any remaining buttermilk. Now it’s time to enjoy your newly churned, fresh butter on bread or as a spread for crackers!

Credit: www.sixthbloom.com
Educational Benefits For Little Learners
Turning cream into butter is not just fun. It’s a science lesson in disguise! Little hands get busy shaking and churning, while their minds encounter fascinating changes. This hands-on activity offers multiple learning opportunities for children.
Learning The Science Behind Emulsion
Butter making is a delightful reveal of science in action.
- Children see liquids transform into solids.
- They explore emulsion, the process where water droplets mix with fat.
- Questions arise, igniting curiosity about everyday chemistry.
- Little learners grasp cause and effect as they witness the change.
Enhancing Motor Skills Through Churning
Churning cream requires coordination and strength. This activity:
- Improves hand-eye coordination as children focus on the task.
- Builds arm muscles and enhances fine motor skills.
- Teaches patience and persistence with every shake.
- Encourages teamwork, if done in a group setting.
Fun With Flavors: Customizing Your Butter
Welcome to the delicious world of homemade butter! Preschoolers love getting creative, and what better way to fuel their imagination than by letting them customize their very own butter? In this part of our butter-making adventure, we’ll spice up our freshly churned butter with fun flavors that excite the taste buds. Remember, making butter isn’t just about shaking up cream, it’s an experience to be savored, with each spread promising a unique taste of wonder!
ADDING HERBS AND SPICES
This is where our butter gets really exciting! After transforming cream into butter, it’s time to mix in some magic. Keep things simple with kitchen staples like chopped parsley or chives for a garden-fresh feel. Or be bold and try a pinch of paprika for a smoky kick. Garlic powder makes butter a savory delight for bread or potatoes!
EXPLORING SWEET AND SAVORY VARIATIONS
Sweet or savory, the choice is up to you! For a sweet twist, mix in a spoonful of honey or maple syrup. Little ones will love spreading this on pancakes or toast. If savory is more your style, blend in some grated cheese or bits of crispy bacon. Sprinkle sea salt to enhance the rich flavors. The possibilities are endless!
Let’s look at a table of simple mix-ins to inspire your little chef:
| Flavor Profile | Mix-in Ideas |
|---|---|
| Herby | Dill, Basil, Thyme |
| Spicy | Cinnamon, Nutmeg, Cloves |
| Sweet | Brown Sugar, Vanilla Extract, Chocolate Chips |
| Savory | Sun-Dried Tomatoes, Olives, Feta |
Here are some simple steps to customize your butter:
- Start with softened, unsalted butter.
- Choose your mix-ins from the table or invent your own.
- Stir the mix-ins into the butter gently.
- Let the flavors meld by refrigerating the butter.
Encourage your preschoolers to get artistic with their butter. They can even make fun shapes with cookie cutters! Let them explore with their senses as they taste and smell their unique creations. Engaging in this flavorful journey not only develops their culinary skills but also cultivates a sense of pride in making something from scratch. So grab a butter knife and let’s spread some joy!
Preserving Your Creation: Storing Homemade Butter
Made butter with your little ones? Great job! Now, let’s talk about keeping that butter fresh. Storing homemade butter properly ensures it stays delicious and safe to eat. Discover the best ways to keep your creation just-right in the fridge and learn how long your butter will last.
BEST PRACTICES FOR REFRIGERATION
Fresh butter deserves love and care. Keep homemade butter tasty and safe with these fridge tips:
- Use a clean container: Select a container that can seal tightly.
- Keep it cool: Your fridge should be below 40°F (4°C).
- Avoid odors: Store away from strong-smelling foods.
- Wrap your butter in wax paper before putting it in a container. This helps maintain its flavor and freshness.
HOW LONG WILL YOUR BUTTER LAST?
Want to know how long your butter can stay good? Look at this simple guide:
| Storage Location | Expected Freshness |
|---|---|
| Fridge | 2-3 weeks |
| Freezer | Up to 6 months |
Remember, always give your butter a quick check before use. If it looks or smells odd, it’s time to make a fresh batch.
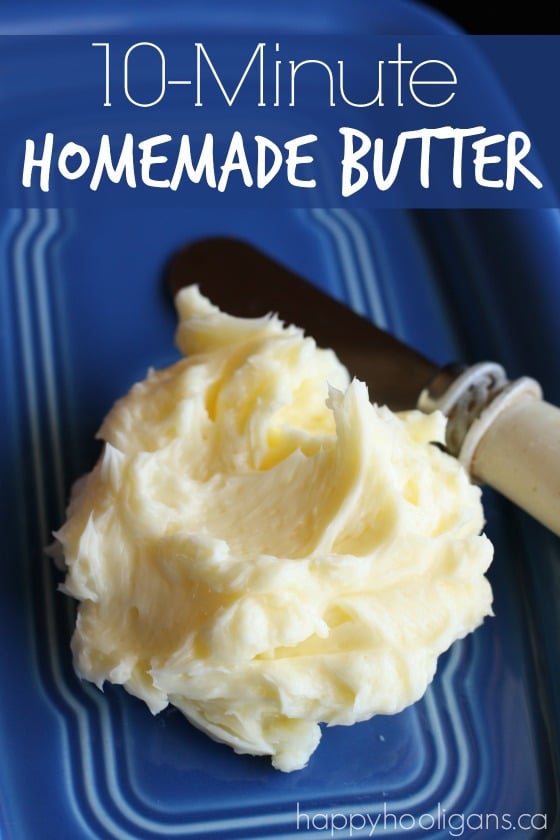
Credit: happyhooligans.ca
Frequently Asked Questions:
What Is The Butter-making Process For Preschoolers?
Making butter with preschoolers involves shaking heavy cream in a jar until it separates into butter and buttermilk. It’s a simple, educational activity that showcases a physical change while providing a fun and engaging experience.
How To Make Butter in a Jar with Kids?
- Ingredients and Tools:
- Heavy cream, jar with a tight lid.
- Process:
- Fill jar halfway with cold cream.
- Tightly close lid and have kids shake vigorously.
- Listen for a change in sound after 10-15 minutes.
- Strain off buttermilk when solids form.
Can Kids Make Butter At Home Safely?
Yes, kids can safely make butter at home under supervision. Using just heavy cream and a jar with a tight lid ensures an easy and secure process. Adults should oversee the activity to ensure safety throughout.
What Are The Educational Benefits Of Butter Making?
Butter making introduces preschoolers to concepts like states of matter, the origin of food, and basic chemistry. It also develops motor skills through shaking the jar, and patience while waiting for the cream to turn into butter.
How Long Does It Take To Make Butter With Preschoolers?
The activity typically takes about 10-20 minutes of shaking. The exact time can vary depending on the amount of cream, the temperature, and the vigor with which children shake the jar.
Conclusion
Making butter with your little one isn’t just messy fun, it’s a super cool learning adventure. We’ll shake, we’ll swirl, and watch plain cream turn into yummy butter! It’s like science, history, and a delicious reward all in one jar. So, grab your aprons, get ready to shake, and let’s create memories that taste like sunshine!
Your little one surely is!