

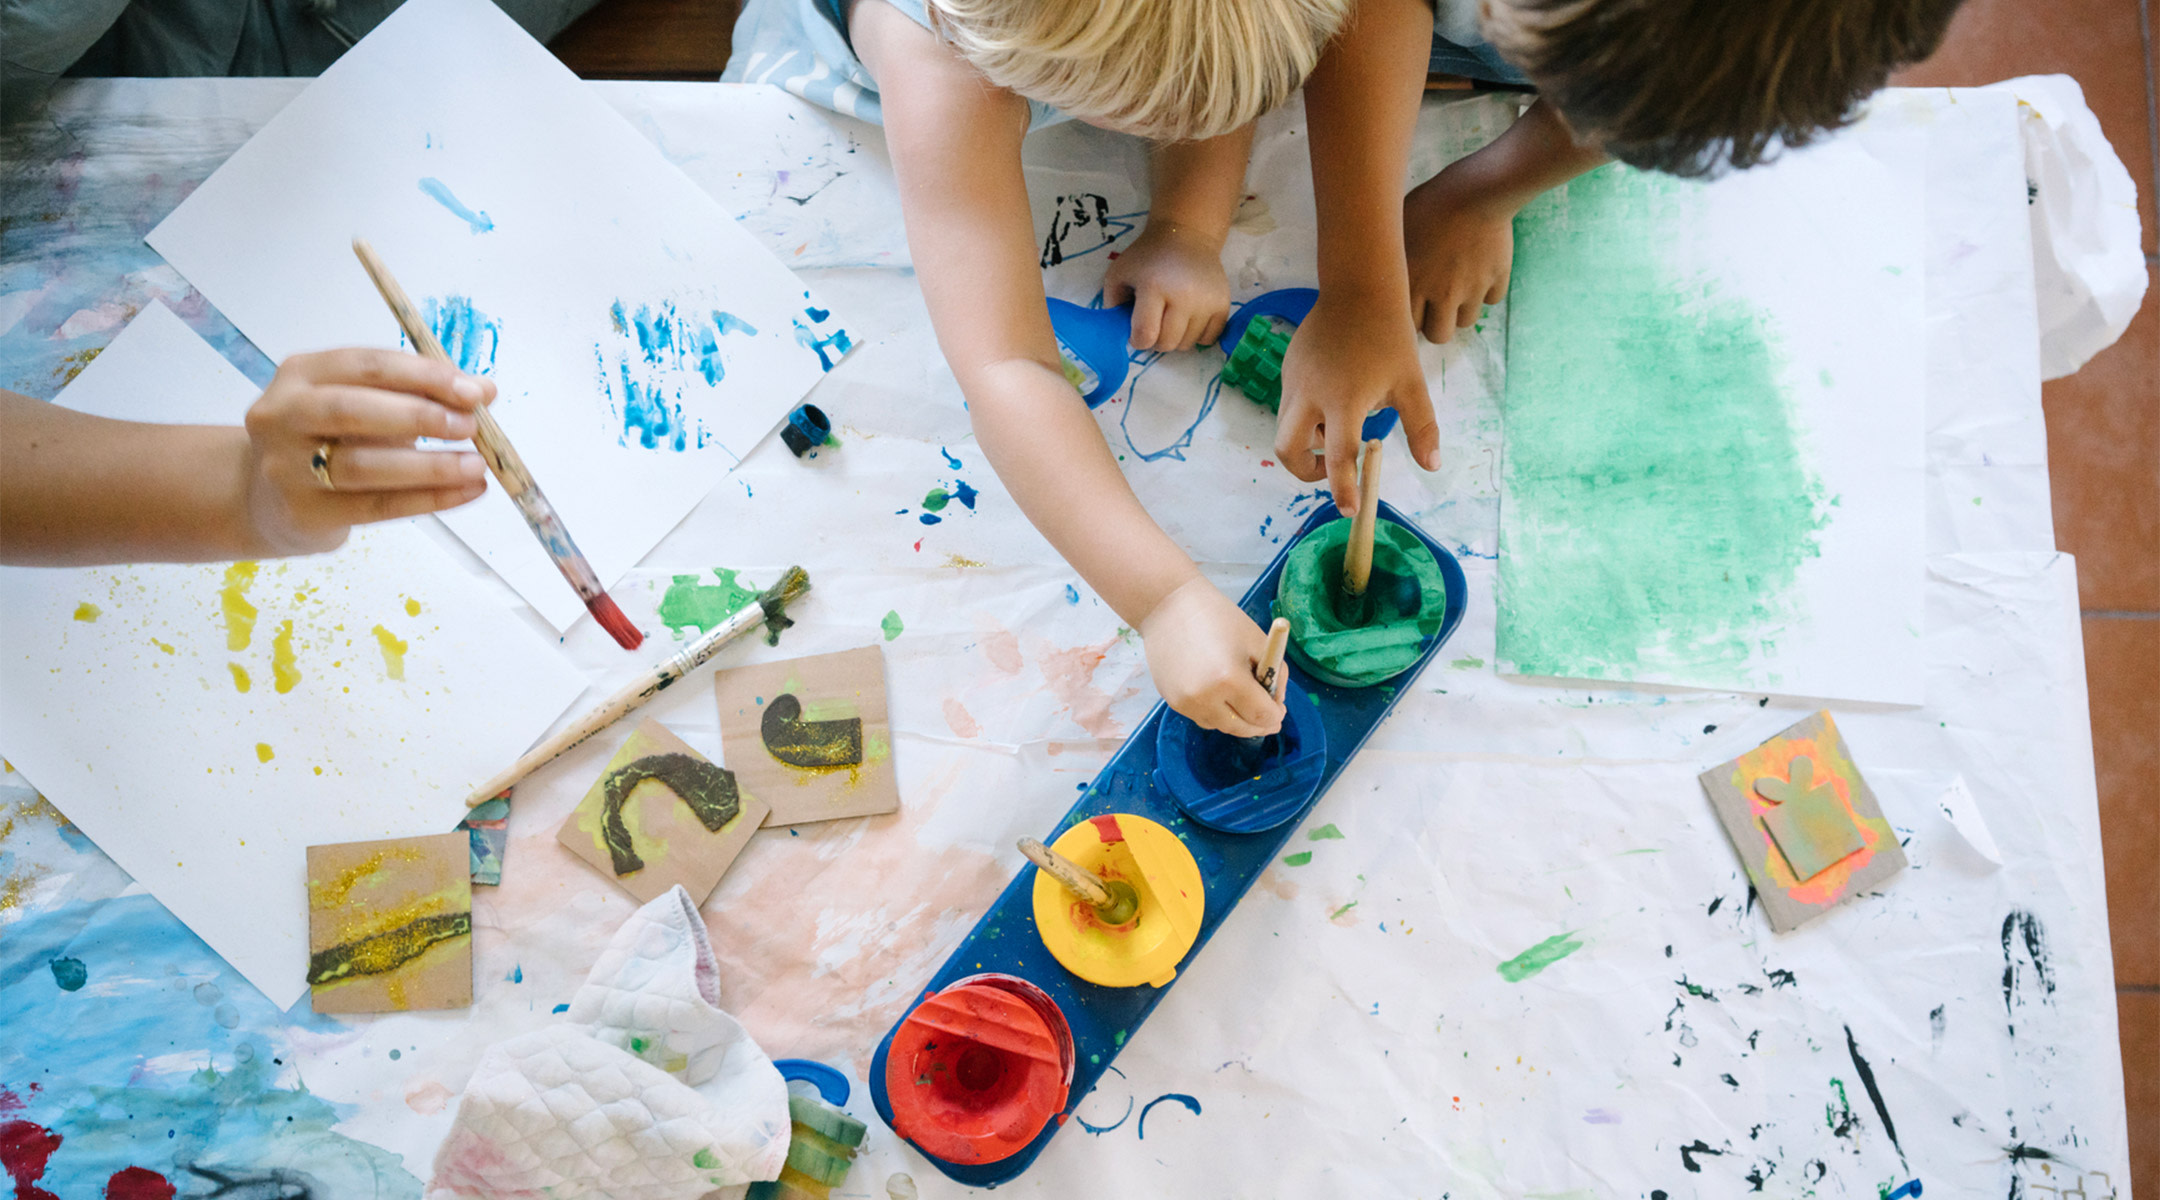
Here are 19 fall process art activities for children that are engaging and creative. Fall is the perfect time to explore different art techniques and materials, while also celebrating the beauty of the season.
From leaf rubbings to pumpkin painting, these activities offer hands-on experiences that encourage imagination and self-expression. Whether your child is a budding artist or simply loves to get messy, they are sure to enjoy these fall-themed art projects. So grab some supplies and let the creativity flow!
Leaf Printing
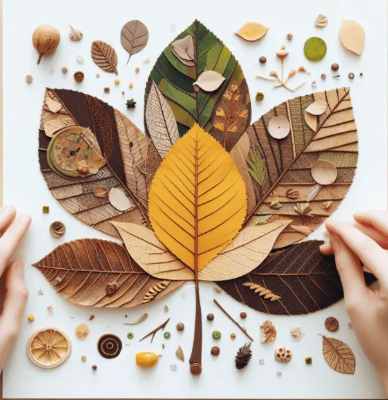
Leaf printing is a wonderful process art activity for children that combines creativity with the beauty of nature. It allows kids to explore different colors and combinations while creating unique artworks using real leaves. Through this activity, children can discover the shapes, textures, and patterns found in leaves and use them as tools to leave their mark on paper. Whether done at home or in a classroom setting, leaf printing is a fun and engaging way for kids to connect with nature and express their artistic abilities.
Using Real Leaves To Create Prints
Using real leaves to create prints is a simple yet captivating activity for children. The process starts with selecting a variety of leaves of different shapes and sizes. Next, the leaves are dipped in non-toxic paint or ink and carefully placed on a piece of paper. With a gentle press, the leaf’s natural patterns and textures are transferred onto the paper, creating a beautiful print. Children can experiment with various colors, arranging leaves in different positions, and even layering multiple leaves to create intricate designs.
Exploring Different Colors And Combinations
Leaf printing opens up a world of possibilities for children to explore different colors and combinations. They can use a wide range of paints or inks to add vibrancy and individuality to their prints. By mixing colors, kids can discover how primary colors blend to create secondary colors, fostering their understanding of color theory through hands-on experience. Encouraging children to experiment with different color combinations not only enhances their creativity but also teaches them about the exciting world of colors.
Creating Unique Artwork
Each leaf print created by children is truly unique. No two prints will be exactly the same, as nature’s artistry shines through in every imprint. This allows children to celebrate their individuality and artistic expression. The unpredictability of the process adds an element of surprise and excitement, keeping children engaged and curious throughout. Moreover, these prints can be framed or used to make greeting cards or collages, making them a valuable memento of a creative adventure.
Embracing The Beauty Of Nature
Leaf printing not only allows children to explore their creativity but also fosters a deeper appreciation for the beauty of nature. By using real leaves as tools in their artwork, children develop a connection with the natural world around them. They become aware of the intricate details found in leaves, such as the veins and textures, and gain a greater understanding of the diversity and uniqueness of the plant kingdom. Through leaf printing, children can experience firsthand how art and nature are intertwined.
Introducing children to the wonders of leaf printing not only cultivates their artistic skills but also encourages them to observe and appreciate the beauty of their surroundings. This engaging process art activity provides a platform for children to explore color, texture, and individual creativity through the medium of real leaves. So, gather some leaves, grab some colorful paints, and embark on a journey of artistic discovery with the fascinating world of leaf printing.
Pumpkin Collage
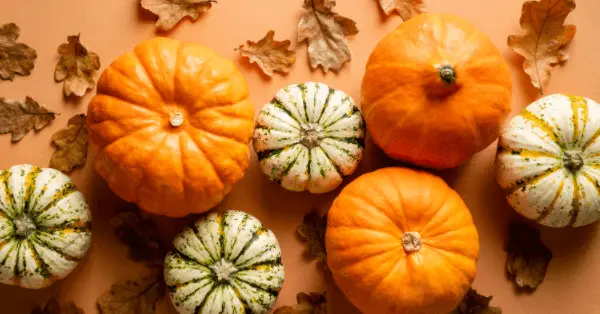
Fall is the perfect time for creative and messy art activities, and one that children will surely enjoy is the pumpkin collage. This activity allows children to explore their artistic skills while creating a beautiful pumpkin masterpiece using various materials. By incorporating different textures and shapes, children can create unique and eye-catching collages that showcase the beauty of fall and the spirit of Halloween. In this section, we will discuss how to create a pumpkin collage using various materials and ideas to make it even more fun and engaging for children.
Materials Needed:
To create a pumpkin collage, you will need the following materials:
- Construction paper in different shades of orange, green, and brown
- Scissors
- Glue
- Marker
- Various textured materials such as tissue paper, fabric scraps, yarn, and more
- Additional decorations like googly eyes, glitter, and stickers
Step-by-step Instructions:
- Start by drawing the outline of a pumpkin on a piece of construction paper using a marker. Encourage children to draw a pumpkin shape that is unique and different from the traditional round shape.
- Once the pumpkin outline is drawn, instruct children to cut out the shape using scissors. This step helps children to practice their fine motor skills while also creating the base for their collage.
- Now it’s time for the fun part! Provide children with a variety of textured materials such as tissue paper, fabric scraps, yarn, and more. Encourage them to cut or tear up the materials into different shapes and sizes, ensuring they have enough variety to choose from.
- Let children unleash their creativity by gluing the textured materials onto their pumpkin collage. They can mix and match the different textures, layering them onto the pumpkin shape to create a visually appealing collage.
- For an added touch, encourage children to add extra decorations such as googly eyes, glitter, and stickers to their collage. This step allows them to personalize their pumpkin and make it truly unique.
- Once the collage is complete, give children the opportunity to showcase their artwork. They can display their pumpkin collages on a bulletin board, create a fall-themed mural, or even take them home to proudly show their family and friends.
The pumpkin collage activity not only allows children to explore their creativity but also provides an opportunity for them to develop fine motor skills, hand-eye coordination, and spatial awareness. By incorporating different materials and textures, children can further enhance their sensory experiences. This fall process art activity is a great way to engage children in art while celebrating the beauty of the season.
So, gather the materials, let children’s imagination run wild, and watch them create stunning pumpkin collages that capture the essence of fall!
Nature Mobile
Fall is the perfect time to get outside and collect natural materials for arts and crafts. One fun and engaging activity for children is creating a nature mobile. These hanging mobiles can be made using a variety of materials found in nature, such as leaves, pinecones, twigs, acorns, and shells. Not only does this activity encourage children to observe and explore the outdoors, but it also provides an opportunity for them to engage in a creative process. Here’s how you can gather natural materials to make a stunning nature mobile:
Collecting Natural Materials To Make A Hanging Mobile
Gather your little ones and head outdoors to explore the beauty of fall. Encourage them to collect a variety of natural materials, such as colorful leaves in different shapes and sizes, pinecones with interesting textures, small twigs, acorns, and even seashells if you live close to the coast. Encourage their curiosity and let them take the lead in choosing the materials they find most fascinating.
Divide a bag or basket into different sections to help children categorize their findings. This not only helps with organization but also sparks conversations about the different characteristics of each item. Discuss the colors, shapes, and textures of the natural materials they’ve collected while emphasizing the uniqueness of each one.
Encouraging Observation And Exploration Of The Outdoors
As your children collect natural materials for their mobile, encourage them to observe their surroundings and explore the outdoors. Point out the changing colors of the leaves, the sound of crunching leaves under their feet, or the various creatures they may encounter. By fostering a sense of wonder and curiosity, you are helping them develop a deeper appreciation for nature and the changing seasons. Additionally, encourage them to touch and feel the different textures of the materials they collect, connecting their senses to the natural world around them.
This activity provides an excellent opportunity to discuss the natural processes occurring during the fall season, such as the changing colors of leaves, the migration of birds, or the growth cycle of plants. Take this chance to explain the science behind these phenomena in simple terms, sparking their interest in the world around them.
Apple Stamping
One of the most fun and creative fall process art activities for children is apple stamping. This activity not only allows children to explore their artistic side, but it also introduces them to the concept of patterns and texture. Using apples as stamps, children can experiment with different paints and create unique designs. Let’s take a closer look at how to use apples to create stamp designs and how to experiment with different paints and patterns.
Using Apples To Create Stamp Designs
Apple stamping is a simple yet exciting way to create stunning designs. Start by cutting an apple in half horizontally, making sure to remove any seeds or stems. Now, you have your apple stamp! Dip the cut side of the apple into a shallow dish of paint, ensuring that the paint covers the surface evenly. Then, press the painted side of the apple onto paper or a canvas to create beautiful stamp designs.
Experimenting With Different Paints And Patterns
When it comes to apple stamping, the possibilities are endless. Children can experiment with different types of paint to create a variety of effects. Watercolors can create a delicate and transparent look, while tempera paints provide vibrant and opaque results. Additionally, children can mix colors on the apple stamp to create unique shades and hues.
To add more excitement to the activity, encourage children to experiment with different patterns. They can stamp the apples in a linear fashion to create a neat row of designs, or they can try randomly stamping the apples to create an abstract pattern. They can also layer multiple stamps on top of each other to make more intricate designs.
Furthermore, apple stamping can be used on various surfaces. Children can stamp apples on paper, canvas, or even fabric. This opens up endless possibilities for creative projects such as making greeting cards, creating unique wrapping papers, or designing personalized cloth items.
Overall, apple stamping is a fantastic fall process art activity that engages children in creative expression while introducing them to the concepts of patterns, texture, and color mixing. Whether they are creating their own artwork or using stamps to decorate other objects, this activity allows children to explore their artistic talents and have fun with nature’s own stamp. So, grab some apples, prepare the paints, and watch as your child’s imagination takes flight!
Twirling Fall Leaves
Discover 19 engaging Fall Process Art Activities for Children, including the captivating Twirling Fall Leaves project. Explore creative ways to keep kids entertained and inspired with these hands-on seasonal art activities.
Crafting Twirling Fall Leaves Using Paper And String
Autumn is the perfect season to get creative with the vibrant colors and falling leaves. One fun and engaging activity that children can enjoy is crafting twirling fall leaves using paper and string. This process art activity not only promotes creativity but also encourages imaginative play and movement. Children will have a blast as they watch their leaves twirl and dance in the wind. To get started with this activity, gather the following materials: – Colorful construction paper in various autumn shades – Scissors – Hole puncher – Yarn or string – Glue or tape Here’s how you can create your own twirling fall leaves:
1. Begin by cutting out leaf shapes from the construction paper. You can go with traditional oak, maple, or birch leaf shapes, or let your imagination run wild and create unique leaf designs.
2. Once you have your leaf cutouts, use a hole puncher to make a hole near the top of each leaf.
3. Cut a piece of yarn or string that is long enough for the leaves to twirl. Make sure to leave some extra length for hanging.
4. Thread the yarn or string through the hole in each leaf, tying a knot at the end to secure it in place. You can attach multiple leaves to the same string or create individual strings for each leaf.
5. Hang your twirling fall leaves outdoors, by a window, or in a doorway where they can catch the breeze. You can use tape or glue to attach the strings to the desired location. Once your twirling fall leaves are hung up, let the magic happen! As the wind blows, the leaves will spin and twirl, creating a beautiful display of autumn colors.
This activity not only allows children to explore their creativity by designing unique leaves but also promotes imaginative play as they watch their creations come to life. Encourage your little ones to create stories and adventures inspired by their twirling fall leaves. They can pretend to be the leaves themselves, floating through the air or getting caught in a gust of wind. This imaginative play adds a whole new dimension to the activity and keeps children engaged for hours. In addition to the creative aspects, twirling fall leaves also provide a wonderful opportunity for children to get moving. They can run, dance, or jump alongside their twirling leaves, embracing the joy and energy of the season. This physical activity not only exercises their bodies but also enhances their gross motor skills and coordination. Crafting twirling fall leaves using paper and string is a fantastic process art activity that combines creativity, imagination, and movement. It’s a simple yet engaging project that will captivate children and bring the beauty of autumn into their playtime. So, grab some paper, string, and scissors, and let your little ones create their very own twirling fall leaves!
Pinecone Hedgehogs
Explore 19 engaging fall process art activities that unleash children’s creativity, including the fun and adorable Pinecone Hedgehogs. These activities are perfect for autumn-inspired crafting and provide opportunities for hands-on learning and sensory experiences.
Transforming Pinecones Into Adorable Hedgehog Characters
Pinecone Hedgehogs are the perfect fall craft activity that combines nature and creativity. This simple yet engaging art project transforms ordinary pinecones into adorable hedgehog characters. Kids will love bringing their hedgehogs to life with just a few materials and their imagination. It’s a great way to promote fine motor skills and nurture their creativity. Let’s dive into the world of Pinecone Hedgehogs and explore how this activity can be a memorable experience for your little ones.
Autumn Tree Paper Roll Craft
Create beautiful autumn tree crafts using paper rolls with these fun fall process art activities for children. Explore a variety of techniques to make colorful and textured trees, perfect for celebrating the season.
Making A Fall Tree Using Recycled Paper Rolls
One of the most enjoyable and eco-friendly activities you can engage your children in this fall is creating their own autumn tree using recycled paper rolls. This craft allows them to explore their creativity while also teaching them about the changing colors of leaves in the beautiful season of autumn.
- Recycled paper rolls
- Scissors
- Craft paint in various autumn colors
- Paintbrushes
- Construction paper
- Glue
- Markers or crayons
- Optional: glitter, sequins, or other decorative elements
Once you have all the materials ready, follow these simple steps:
Step 1: Prepare the recycled paper rolls
Start by cutting the recycled paper rolls into smaller sections, roughly 2 to 3 inches in length. These will serve as the trunks for your autumn trees.
Step 2: Paint the paper rolls
Using the craft paint in various autumn colors, invite your children to paint the paper rolls. Encourage them to mix and blend the colors to capture the vibrant hues of fall leaves. Let the painted paper rolls dry completely before moving on to the next step.
Step 3: Create the tree canopy
Take a sheet of construction paper and cut out a large oval or circle shape. This will be the canopy of your autumn tree. You can use a single color or create a pattern by combining different shades of brown and green.
Step 4: Attach the tree trunk
Apply glue to one end of the painted paper roll and carefully stick it onto the construction paper canopy. Secure it in place by pressing down gently.
Step 5: Add autumn leaves
Using markers or crayons, let your children draw or color various shapes representing autumn leaves around the tree canopy. Encourage them to experiment with different colors and patterns to imitate the stunning foliage of the season.
Step 6: Optional: Decorate with glitter and sequins
If you want to add an extra touch of sparkle, you can invite your children to sprinkle glitter or attach sequins to the leaves and tree trunk. This step is entirely optional but can make the craft even more visually appealing.
Once your autumn tree using recycled paper rolls is complete, proudly display it in your home or create a mini forest by making several trees. This simple yet engaging process art activity not only encourages imaginative play but also teaches children about the beauty of autumn and the importance of recycling. So gather your materials and let your children’s creativity soar as they bring the colors of fall to life!
Scarecrow Collage
Discover 19 captivating fall process art activities for children, including the Scarecrow Collage. Engage your little ones in hands-on fun while fostering creativity and imagination during the autumn season.
Constructing A Scarecrow Using Various Materials And Textures
One of the most iconic symbols of fall is the scarecrow. With its straw-filled body and whimsical appearance, scarecrows not only add a touch of charm to the season but also serve a practical purpose in protecting crops from nosy birds. And what better way to engage children in the spirit of fall than by creating their very own scarecrow collage?
Constructing a scarecrow collage is a fantastic process art activity that allows children to explore different materials and textures while honing their fine motor skills. It’s a hands-on experience that encourages creativity and imagination, as little ones experiment with various elements to build their own unique scarecrow masterpiece.
With this activity, children can let their artistic flair shine by using materials such as:
- Fabric scraps
- Burlap
- Construction paper
- Feathers
- Pom-poms
- Buttons
- Felt
- Raffia
By incorporating these diverse textures, children can create a tactile and visually interesting scarecrow collage. They can experiment with different shapes, sizes, and colors to add depth and character to their artwork.
Discussing The Purpose Of Scarecrows In Fall
Understanding the purpose of scarecrows in fall can give children a deeper appreciation for this seasonal icon. Scarecrows have been used for centuries as a means to keep birds away from crops. Their presence alone is often enough to deter birds from landing and pecking away at precious plants. Farmers strategically position scarecrows throughout their fields, creating a visual deterrent that helps protect their crops.
While scarecrows serve a practical purpose, they have also become a beloved symbol of fall festivities. With their friendly faces and quirky outfits, scarecrows have found their way into garden decorations, crafts, and stories, capturing the imagination of both children and adults.
When children engage in the scarecrow collage activity, they not only get to express their creativity, but also learn about the important role scarecrows play in the fall season. It’s an opportunity to spark conversations about agriculture, nature, and the changing seasons.
Corn Mosaic
One of the most engaging fall process art activities for children is creating a corn mosaic. It not only allows kids to explore their creativity but also provides an opportunity to learn about colors and patterns. By using colored corn kernels, children can design beautiful and unique mosaic artwork. Let’s dive in and discover how to create a corn mosaic and how it can enhance your child’s artistic skills.
Exploring Different Colors And Patterns
When it comes to creating a corn mosaic, children have the chance to explore different colors and patterns. By using corn kernels in various shades such as yellow, orange, and even purple, they can experiment with different color combinations to create stunning visual effects. This activity allows them to understand the concept of color mixing and how different colors can harmonize or contrast with each other.
Moreover, corn mosaics also encourage children to explore different patterns. They can arrange the corn kernels in various ways, creating stripes, swirls, or even intricate designs. These patterns not only add visual interest to the artwork but also challenge children’s spatial awareness and fine motor skills as they carefully place each kernel in its designated spot.
Creating a corn mosaic is an excellent way for children to express their artistic ideas and develop their imagination. It provides them with a tactile experience as they handle the corn kernels, feeling their shape and texture. This hands-on activity stimulates their senses and helps them develop their fine motor skills and coordination.
In addition, corn mosaics can be used as a sensory activity for younger children. Allowing them to explore the texture and colors of the corn kernels enhances their sensory development and encourages sensory exploration.
By engaging in the process of creating a corn mosaic, children not only learn about colors and patterns but also develop patience, perseverance, and attention to detail. It encourages them to think critically and make decisions about color placement, helping them enhance their problem-solving skills.
Overall, corn mosaics are a fantastic fall process art activity for children. They provide a fun and engaging way for kids to explore colors, patterns, and their own creativity. So grab some colored corn kernels and watch as your child brings their artistic vision to life!
Handprint Turkey
Among the many symbols of Thanksgiving, the turkey holds a special place. It represents abundance, gratitude, and of course, a delicious feast shared with loved ones. When it comes to incorporating the Thanksgiving spirit into process art activities for children, making a turkey using handprints is a classic and fun idea.
Making A Turkey Using Handprints
The handprint turkey is a simple yet creative art project for children to express their imagination while learning about Thanksgiving traditions. This activity allows children to explore their creativity and develop their fine motor skills through painting and crafting. Here’s how you can create a handprint turkey together:
- Start by preparing the materials needed: washable tempera paint in various autumn colors such as brown, orange, red, and yellow, a large white paper or canvas, brushes, water, and paper towels.
- Begin by applying paint to the palm and fingers of the child’s hand using a brush or by dipping their hand directly into paint trays.
- Next, ask the child to press their painted hand onto the paper or canvas firmly, creating a handprint. Encourage them to make multiple handprints in different angles to resemble turkey feathers.
- Once the handprints are done, set them aside to dry. Meanwhile, clean the child’s hands with water and soap.
- After the handprints have dried, use brown paint to create the turkey’s body and head. You can paint a small oval shape at the bottom of the handprint for the body and a larger oval shape at the top for the head.
- Now it’s time to add some fun details! Using smaller brushes or even fingertips, children can paint eyes, a beak, and a wattle on the turkey’s head. Don’t forget to add colorful, feathery designs to the handprint feathers as well.
- Once the paint has dried, the handprint turkey artwork is complete and ready to be displayed. You can frame it, hang it on the wall, or use it as a Thanksgiving decoration for your home.
The handprint turkey activity is a wonderful way to encourage children to express their creativity while learning about the symbol of turkeys on Thanksgiving. This process art project allows children to explore colors, shapes, and textures, promoting their cognitive development. Besides, it can be a cherished keepsake that reminds families of the joy and gratitude associated with the holiday season.
Acorn Painting
As the cool breeze sets in and the leaves change their color, fall becomes the perfect season for engaging in creative activities with children. One such activity that sparks imagination and encourages exploration is acorn painting. Using acorns as paintbrushes, children can create unique artwork while experimenting with different painting techniques and textures. From finger painting to stamping, the possibilities are endless with these tiny, nature-inspired tools. In this blog post, we will explore a variety of fall process art activities, including acorn painting, to keep children entertained and inspired throughout the season. Let’s dive in!
Using Acorns As Paintbrushes For Unique Artwork
Acorns, with their natural shape and texture, provide an interesting twist to traditional paintbrushes. By attaching them to the top of a stick or pencil using tape or glue, children can create exciting patterns and designs on paper or canvas. The acorn’s rounded end creates circular strokes, adding a whimsical touch to their artwork. Encourage children to experiment with different pressure and angles to create varying effects. This hands-on activity not only enhances children’s fine motor skills but also allows them to explore their creativity with a unique twist.
Experimenting With Different Painting Techniques And Textures
Acorn painting opens up a world of possibilities when it comes to exploring various painting techniques and textures. Children can dip the acorn paintbrushes into different colors and unleash their creativity on blank canvases or paper. From swirling the acorn around in circular motions to create mesmerizing patterns to tapping the acorn on the surface for a splatter effect, there are countless techniques children can experiment with. Encourage them to explore different strokes, smudging, or even combining the acorn paintbrushes with other materials like leaves or feathers to add interesting textures to their artwork. The vibrancy and texture of the painted acorns allow for a visually captivating experience that will keep children engaged and inspired.
Acorn painting not only provides a wonderful opportunity for children to express themselves artistically but also allows them to connect with nature in a creative way. So, gather some acorns, paints, and let the artistic journey begin!
Leaf Crowns
Discover 19 engaging fall process art activities for children, including the fun and creative project of making leaf crowns. Let their imagination roam as they craft beautiful crowns using colorful leaves, encouraging their artistic skills and connection to nature.
Crafting Crowns Using Real Leaves And Natural Materials
If you’re looking for a fun and creative fall process art activity for your children, then leaf crowns are a must-try. Crafting crowns using real leaves and natural materials not only allows children to explore the beauty of nature but also encourages their imagination and storytelling skills. It’s a simple yet engaging project that your little ones will enjoy.
Materials Needed
To create these beautiful leaf crowns, you’ll need just a few materials:
- Real fall leaves of different shapes and colors
- Scissors
- Glue or tape
- A long strip of paper or cardboard
- Decorative elements like acorns, pinecones, or feathers (optional)
Instructions
- Collect a variety of fall leaves with different colors and sizes. Make sure to choose sturdy leaves that are not too dry and brittle.
- Carefully cut off the stems from the leaves, leaving only the leaf itself.
- Take the long strip of paper or cardboard and measure it around your child’s head to determine the proper size for the crown. Trim it to the correct length.
- Using glue or tape, attach the base of the leaves to the strip of paper or cardboard. Be creative with the arrangement of the leaves, overlapping them for a more visually appealing crown.
- Allow the glue to dry completely before letting your child wear the crown.
- If desired, you can add additional decorative elements like acorns, pinecones, or feathers to enhance the crown’s look.
Imaginative Play And Storytelling
Once the leaf crown is complete, watch as your child’s imagination takes flight. Encourage them to engage in imaginative play by pretending to be a prince or princess, a woodland fairy, or even a wise nature explorer. This simple prop can spark storytelling adventures and create a world of imaginative possibilities.
The leaf crown is not only a beautiful accessory but also a tangible reminder of the beauty of the fall season. It’s a creative way for children to connect with nature and explore their artistic abilities. So why not give leaf crowns a try this fall and see where your child’s imagination takes them?
Paper Plate Owl
Creating a paper plate owl is a fantastic fall process art activity that will not only engage children in a creative endeavor but also introduce them to the incredible characteristics and habits of owls. This hands-on craft allows kids to explore their artistic abilities while learning about the fascinating world of owls in a fun and interactive way. With just a few simple craft materials and a dash of imagination, children can bring these elusive creatures to life and gain a deeper appreciation for nature during the colorful fall season.
Making An Owl Using Paper Plates And Craft Materials
One of the most popular fall process art activities for children is making an owl using paper plates and craft materials. This delightful craft project not only ignites their artistic flair but also encourages fine motor skills and imagination. Here’s a step-by-step guide on creating your very own paper plate owl:
- Start by gathering the necessary materials, including:
| 1 paper plate | Construction paper | Glue | Scissors | Markers or crayons | Googly eyes |
- Take the paper plate and fold it in half to create the owl’s body shape.
- Using the construction paper, cut out shapes for the owl’s wings, beak, and feathers.
- Glue the wings onto the sides of the folded paper plate to create the owl’s wingspan.
- Attach the beak and feathers to the folded part of the paper plate, just above the wings.
- Add googly eyes to bring your owl’s face to life.
- Encourage children to use markers or crayons to add additional details or patterns to their owl.
- Allow the craft to dry, and then hang the finished product to admire!
Discussing The Characteristics And Habits Of Owls In Fall
Owls are fascinating creatures with unique characteristics and habits, especially during the fall season. Understanding their behavior and features adds depth to the paper plate owl craft activity. Here are a few facts children can learn about owls during this engaging process art:
- Owls are nocturnal birds, which means they are most active during the night. Their keen eyesight and excellent hearing help them hunt for food in the darkness.
- They have special feathers that allow them to fly silently. This stealthy flight helps them sneak up on their prey without making a sound.
- Owls have incredible hearing abilities. Their ears are asymmetrical, with one higher than the other, allowing them to pinpoint the exact location of sounds.
- These birds are known for their incredible ability to rotate their heads up to 270 degrees, enabling them to scan their surroundings without moving their bodies.
- Owls come in a variety of species and sizes, each adapted to their specific habitats and hunting techniques.
By engaging children in the process of creating a paper plate owl while teaching them about the characteristics and habits of real owls, this fall process art activity becomes both educational and entertaining. The combination of creativity and learning fosters a deeper connection with nature and appreciation for these remarkable creatures.
Harvest Corn Prints
Harvest Corn Prints offers exciting fall process art activities for children. Let them explore creativity and cultivate their artistic skills with these fun and engaging projects.
Using Corn Cobs To Create Unique Prints
One of the most exciting fall process art activities for children is Harvest Corn Prints. This activity combines the beauty of autumn and the creativity of art in a fun and engaging way. By using corn cobs as stamps, children can explore different shapes and arrangements to create unique prints. With a few simple materials and a lot of imagination, you can easily set up this activity for your little ones to enjoy.
Pumpkin Sun Catcher
Explore 19 captivating fall process art activities for children, including the Pumpkin Sun Catcher, an engaging project that combines creativity and nature. Spark their imagination and celebrate the beauty of autumn with these hands-on crafts.
Creating A Sun Catcher Using Tissue Paper And A Pumpkin Outline
The Pumpkin Sun Catcher is a fun and creative fall process art activity that children will absolutely love. It combines the beauty of vibrant tissue paper with the iconic symbol of fall – the pumpkin. This engaging art project allows children to explore their creativity, develop their fine motor skills, and learn about the symbolism of pumpkins in the autumn season. To create a Pumpkin Sun Catcher, gather the following materials:
- Black construction paper
- Orange tissue paper
- Scissors
- Glue stick
- String or ribbon
- Start by drawing or printing out a pumpkin outline on the black construction paper. You can find printable pumpkin templates online or simply draw one freehand.
- Using scissors, carefully cut out the pumpkin shape. Make sure to leave a small border around the edges.
- Next, cut the orange tissue paper into small squares or rectangles. These will be used to fill in the pumpkin shape.
- Apply a thin layer of glue to one section of the pumpkin.
- Place a piece of orange tissue paper on the glued area and press it down gently. Repeat this step until the entire pumpkin shape is filled with tissue paper squares.
- Allow the glue to dry completely.
- Once the glue is dry, carefully cut out the inside of the pumpkin shape, leaving only a border of black construction paper.
- Punch a hole at the top of the pumpkin and thread a piece of string or ribbon through it.
- Your Pumpkin Sun Catcher is now ready to be displayed! Hang it near a window where the sunlight can shine through and create a beautiful, colorful glow.
Discussing The Symbolism Of Pumpkins In Fall
Pumpkins hold a special place in the hearts of many during the fall season. They symbolize a variety of meanings, such as harvest, abundance, and warmth. As the days grow shorter and the weather turns cooler, pumpkins become a prominent symbol of autumn and all the festivities it brings. In addition to their association with Halloween and Thanksgiving, pumpkins also represent creativity and transformation. From carving jack-o’-lanterns to making delicious pumpkin pie, these versatile gourds inspire both artistic expression and culinary delight. They remind us of the joy and warmth that comes with gathering around a cozy fireplace, sipping warm apple cider, and enjoying the company of loved ones during this special time of year. So why not incorporate the symbolism of pumpkins into a fun and educational art activity? The Pumpkin Sun Catcher provides children with an opportunity to explore their creativity while learning about the significance of pumpkins in the fall. By creating their own beautiful sun catcher, they can further appreciate the beauty and meaning behind this iconic autumn symbol. Whether you choose to engage in the Pumpkin Sun Catcher or any other fall process art activities with your little ones, these experiences will not only stimulate their imaginations but also provide valuable learning opportunities. So go ahead, embrace the magic of fall, and let your children explore their creativity with these engaging and enjoyable autumn-inspired art projects.
Fall Nature Collage
Explore the wonders of fall with these 19 process art activities for children, including the Fall Nature Collage. Engage in hands-on creativity and discover the beauty of the season through artistic expression. Create vibrant collages using natural materials found in the great outdoors.
Collecting And Arranging Natural Materials To Make A Collage
A Fall Nature Collage is a perfect activity to engage your child’s creativity while promoting their appreciation for the outdoors. This process art activity encourages children to collect and arrange various natural materials to create a unique and beautiful collage.
Getting started with a Fall Nature Collage is as easy as taking a walk outside with your child. Encourage them to gather fallen leaves, twigs, acorns, pinecones, and any other natural materials that catch their eye. You can even bring along a small bag or basket to make collecting easier.
Once you have collected a variety of natural materials, it’s time to start arranging them. Spread out a piece of cardboard or a large piece of paper as a base for the collage. Your child can use glue or tape to secure the materials onto the base and create their masterpiece.
Suggest different arrangements to your child, such as arranging the leaves in a pattern or creating a design with the acorns. Encourage them to experiment and explore their creativity, letting their imagination guide the placement of each natural element.
This activity not only allows children to create a beautiful piece of art but also helps them develop fine motor skills as they carefully handle and arrange the materials. Additionally, it encourages children to observe and appreciate the colors, shapes, and textures found in nature.
Promoting Creativity And Appreciation For The Outdoors
The Fall Nature Collage activity is an excellent way to promote creativity and foster a deep appreciation for the outdoors in children. It engages their senses and encourages them to explore the beauty of nature firsthand.
By collecting natural materials for the collage, children develop observation skills, as they search for colorfully vibrant leaves or interestingly shaped twigs. This process allows them to connect with their environment on a deeper level, appreciating the unique qualities of each element they collect.
Arranging the collected materials to create a visually pleasing collage also enhances children’s creativity. They have the freedom to experiment with different combinations, colors, and arrangements, allowing their imaginations to shine through in their artwork.
Furthermore, this activity offers an opportunity for parents and caregivers to engage in meaningful conversations with children about nature. You can discuss the changing colors of leaves during the fall season, the different types of trees and plants, and the role of each natural material in the ecosystem.
Overall, a Fall Nature Collage not only provides a fun and engaging art activity for children but also encourages them to develop a deeper appreciation for the outdoors and the wonders of nature.
Leaf Rubbings
Autumn is the perfect time to engage children in creative and hands-on activities that celebrate the beauty of nature. One such activity that kids love is leaf rubbings. It’s a simple and fascinating process that combines art with science, allowing children to explore different types of leaves and their unique characteristics. Whether using crayons or pencils, leaf rubbings offer endless possibilities for creativity and learning. In this blog post, we will explore various ways to make leaf rubbings and discover the wonders of the natural world.
Making Leaf Rubbings Using Crayons Or Pencils
Leaf rubbings are a fantastic way to capture the intricate details of leaves and create beautiful works of art. To get started, all you need are some leaves, crayons or pencils, and a piece of paper. Here’s a step-by-step guide:
- Select a leaf that you find interesting or visually appealing.
- Place the leaf veined side up on a flat surface.
- Take a piece of paper and place it carefully over the leaf.
- Hold the paper in place with one hand to prevent any movement.
- With the other hand, gently rub the crayon or pencil over the paper, following the outline of the leaf.
- As you rub, the texture and shape of the leaf will start to appear on the paper.
- Experiment with different colors and pressures to create variations in your leaf rubbings.
Leaf rubbings not only allow children to explore their creativity but also enhance their fine motor skills as they hold and maneuver the crayon or pencil. It’s a simple yet captivating process that brings the beauty of nature to life on paper.
Identifying Different Types Of Leaves And Their Characteristics
Leaf rubbings can also be a great opportunity for children to learn about different types of leaves and their unique characteristics. After making leaf rubbings, encourage children to examine the leaves and discuss their observations. This activity promotes critical thinking and helps children develop their observational skills. Here are some discussion points to guide the conversation:
| Leaf Type | Characteristics |
|---|---|
| Maple | Narrow lobes, vibrant red or orange colors |
| Oak | Irregular lobes, deep green color, can be spiky |
| Birch | Heart-shaped leaves, white or silver bark |
| Aspen | Round or ovate leaves with finely serrated edges |
Encourage children to compare the characteristics of different leaves and talk about what makes each one unique. They can also research and learn more about the trees that these leaves come from, expanding their knowledge of the natural world. Leaf rubbings not only engage children in art but also provide a gateway to explore science and foster a deeper connection with nature.
Apple Collage
Discover 19 exciting fall process art activities for children in this Apple Collage blog post. Engage young minds with creative projects that explore textures, colors, and shapes using apples as the main inspiration. Encourage imaginative play while fostering fine motor skills and sensory development.
Creating An Apple Collage Using Various Materials And Textures
The apple collage is a popular fall process art activity for children that allows them to explore their creativity while learning about the significance of apples in the autumn season. This hands-on activity encourages children to use different materials and textures to create a unique collage that represents the beauty and vibrancy of fall.
Discussing The Significance Of Apples In Fall
Apples are a quintessential symbol of fall and are associated with the harvest season. They are widely used in various fall festivities, such as apple picking, cider making, and even caramel apple treats. Apples also hold cultural and historical significance, appearing in myths, folktales, and even religious references. Teaching children about the importance of apples in fall not only connects them to nature but also helps them develop an appreciation for the seasonal changes and the bounty of the harvest.
When it comes to creating an apple collage, the possibilities are endless. Children can use various materials and textures to bring their masterpiece to life. Here are some ideas to get started:
| Materials | Textures |
|---|---|
| Construction paper | Smooth |
| Tissue paper | Crumpled |
| Fabric scraps | Soft |
| Buttons | Hard |
| Feathers | Fluffy |
Children can use the materials listed above to cut out apple shapes from the construction paper and then decorate them using various textures. They can crumple small pieces of tissue paper to create the textured surface of the apple, or glue fabric scraps onto the paper to add a soft and cozy touch. Buttons can serve as the apple’s seeds, and feathers can be used to mimic the leaves.
Moreover, you can encourage children to explore other creative options by incorporating additional materials like sequins, yarn, or even natural elements like leaves and twigs. The beauty of the apple collage activity lies in the freedom it offers to experiment and express creativity.
In conclusion, the apple collage is a fantastic fall process art activity for children. It not only allows them to create a visually appealing masterpiece but also helps them understand the significance of apples in the autumn season. By using various materials and textures, children can explore different artistic techniques and showcase their unique interpretations of fall. So, gather your art supplies and let the apple collage adventure begin!
Scarecrow Puppets
Scarecrows are synonymous with fall, and what better way to celebrate the season than by making scarecrow puppets with your children? This engaging process art activity uses craft sticks and paper to create adorable scarecrow puppets that will ignite your child’s imagination and storytelling skills.
Making Scarecrow Puppets Using Craft Sticks And Paper
Creating scarecrow puppets using craft sticks and paper requires just a few simple materials, making it a perfect activity for young children. Here’s how you can do it:
- Gather the materials needed: craft sticks, construction paper or cardstock in various colors, scissors, glue, markers or crayons, and googly eyes if desired.
- Start by cutting out the scarecrow’s head shape from construction paper or cardstock. Encourage your child to choose their favorite fall colors, such as orange, yellow, or brown.
- Next, cut out a hat shape for the scarecrow using a contrasting color. It can be a simple triangle or a more intricate design.
- Encourage your child to be creative and cut out other scarecrow features such as a nose, mouth, and patches for their scarecrow’s clothes.
- Once all the individual pieces are cut out, it’s time to assemble the scarecrow puppet. Help your child glue the head shape to the top of a craft stick, creating the puppet’s handle.
- Next, have your child glue on the hat, googly eyes, nose, mouth, and patches in their desired positions. Emphasize that there is no right or wrong way to do this – each scarecrow puppet can be unique!
- Finally, encourage your child to use markers or crayons to add any additional details or decorations to their scarecrow puppet, such as stitches on the patches or rosy cheeks.
Once the scarecrow puppets are complete, your child can use them to tell stories, put on puppet shows, or simply let their imagination roam free. This process art activity not only develops their fine motor skills, but also helps foster creativity, storytelling, and imaginative play.
Frequently Asked Questions Of 19 Fall Process Art Activities For Children
What Are Process Art Activities For Children?
Process art activities for children are open-ended and focus on the process of creating rather than the end result. They encourage exploration, experimentation, and creativity, allowing children to express themselves through various materials and techniques.
Why Is Process Art Important For Children’s Development?
Process art is important for children’s development as it enhances their fine motor skills, creativity, problem-solving abilities, and self-expression. It promotes independence, encourages risk-taking, and fosters a sense of accomplishment. Through process art, children learn to think critically, make decisions, and develop their own unique artistic style.
How Can I Incorporate Fall Themes Into Process Art Activities For Children?
To incorporate fall themes into process art activities, you can provide materials like leaves, acorns, pinecones, and fall-colored paints. Encourage children to create artwork inspired by the changing colors of leaves, fall harvest, or Halloween. Allow them to experiment with different textures, patterns, and color blending techniques to capture the essence of the season.
Conclusion
The fall season offers countless opportunities for children to engage in process art activities that are not only fun but also educational. From leaf painting to pumpkin carving, these hands-on experiences help develop fine motor skills, creativity, and problem-solving abilities.
By incorporating nature-inspired elements into art projects, children can also learn about the changing colors and textures of fall. With this list of 19 fall process art activities, you can keep your children engaged and inspired all season long. Whether it’s exploring sensory bins or creating unique leaf prints, these activities are sure to ignite your child’s imagination and foster their love for art.